
FAQs2024-06-21T06:05:11+00:00

7 Tips for Buying an FM Radio Transmitter Kit

Buying an Fm Radio Transmitter Kit can seem simple until you compare power ratings, frequency coverage, audio connections, and assembly requirements. A compact board may look ideal on a product page, yet its documentation or cooling needs may not suit your setup. Small details matter. A clear manual, labeled components, and accessible technical support can make a real difference when you are checking connections or troubleshooting unwanted noise.

This guide introduces seven practical considerations for choosing a kit with care. You will learn to compare the advertised output with your intended use, inspect the supported frequency range, and check which antenna and audio inputs are included. Also consider the power supply, enclosure, and heat management. These details affect both setup and reliability. A seller’s specifications are useful, but they should be checked against the manual and product support information when available. A low price can be convincing; sometimes it is. Still, a polished listing alone cannot show whether a kit is well documented or easy to maintain.

Before buying or operating any transmitter, check the rules and permitted frequencies that apply in your location. Use only authorized settings, and follow the manufacturer’s instructions. This guide does not replace local requirements or professional advice. The best choice is not always the most powerful one. It is the kit that matches your needs, comes with dependable guidance, and can be used responsibly. Expect to compare a few options. The answer may be less obvious than it first appears.
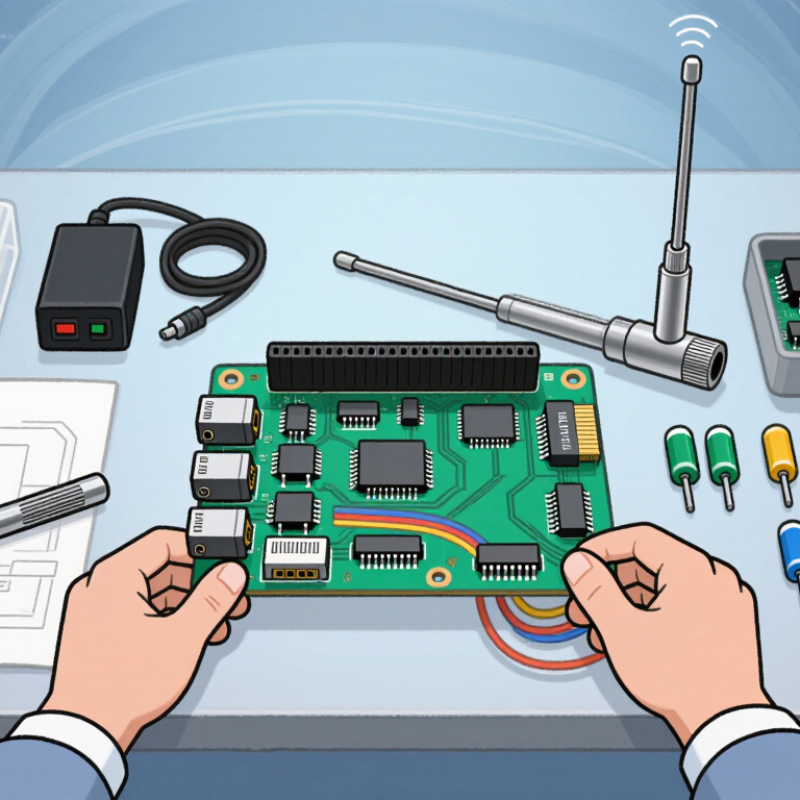
7 Tips for Buying an FM Radio Transmitter Kit

Understanding the Purpose of an FM Radio Transmitter Kit

An FM radio transmitter kit converts an audio signal into a radio signal that a nearby FM receiver can pick up. Its purpose is practical: it helps users explore how sound, frequency, and basic electronics work together. A typical kit may include a circuit board, audio input, antenna, and power connection. Components differ, so check what is included before choosing. Small details matter.

Tip: Decide what you want to transmit. A short educational demonstration, for example, may need only a simple audio input and a receiver in the same room. Sketch the setup first: source, transmitter, and radio. This makes missing cables or unsuitable power supplies easier to spot. Range is not the only measure of usefulness.

Tip: Check the instructions, operating limits, and local requirements before powering the kit. Use the recommended power supply, keep the antenna setup as specified, and test at low output where the kit allows it. Keep the device away from moisture and loose metal objects. Do not assume every available frequency or configuration is appropriate. A quiet test is helpful, but it can reveal less than a real listening check. Review the sound and setup carefully.

7 Tips for Buying an FM Radio Transmitter Kit — Understanding the Purpose of an FM Radio Transmitter Kit
Tip What to Evaluate Why It Matters Practical Check Before Buying
1 Clarify the kit’s purpose Fm Transmitter Kits can be intended for learning, laboratory experiments, or low-power audio links. A kit is not automatically suitable or authorized for broadcasting to the public. Match the kit’s stated use and output specifications to your project, and check applicable radio regulations before transmitting.
2 Check frequency coverage FM broadcast allocations differ by country and region. A frequency range that is usable in one location may be restricted or occupied in another. Confirm that the kit’s tuning range is appropriate for your location and that your chosen frequency is permitted and available.
3 Understand output power and legal limits Permitted transmitter power, antenna arrangements, and licensing requirements vary by jurisdiction. Greater output can increase interference risk. Look for a clearly specified RF output level and verify local rules; do not assume that a low-power claim alone makes operation legal.
4 Review frequency stability A transmitter that drifts from its set frequency can cause poor reception or interfere with nearby signals. Stability can depend on circuit design, components, and temperature. Check whether the kit specifies frequency control or stability, and whether it requires alignment or calibration after assembly.
5 Check audio and modulation features Input connections, audio level controls, and mono or stereo operation affect compatibility with the source and the listening experience. Stereo circuitry may add setup complexity. Confirm the audio input type and required signal level, and choose mono or stereo features according to the intended project.
6 Inspect the antenna and power requirements A suitable antenna connection and stable power supply are important for reliable operation. Antenna impedance and installation details should follow the kit’s documentation. Check the antenna connector or specified antenna arrangement, power-supply voltage and polarity, and any required matching or grounding guidance.
7 Assess assembly, testing, and support Kits vary in difficulty and in what they include. Soldering, adjustment, and safe testing may require tools and basic electronics knowledge. Review the parts list, instructions, required tools, test points, and troubleshooting information. Prefer documentation that explains safe, compliant testing.

Checking Local Rules and Available FM Frequencies

Before buying an FM radio transmitter kit, check the rules where you plan to use it. Requirements can vary by country and region. Some places restrict transmission power, antenna placement, or operating conditions. Others may require authorization. Read current guidance from your local communications regulator, and contact it if the rules are unclear. Guesswork is not a good plan.

Then check which frequencies are available for your intended use. Official frequency databases and regulator guidance are more reliable than a quick scan on a pocket radio. A quiet channel at noon may carry a distant station at night. Nearby transmitters can also create interference, even when they seem faint indoors. Check from the actual installation area, if permitted, and repeat the check at different times.

Match the kit’s frequency range and power settings to what local rules allow. A broad tuning range does not mean every setting is permitted. Keep notes on the frequencies you checked and the date; conditions can change. This step can feel tedious. Still, it may prevent buying equipment that cannot be used as intended. If you are uncertain, ask a qualified radio professional or the relevant regulator before placing an order.

Comparing Power, Range, and Audio Specifications

Tip 1: Compare power ratings carefully. A kit’s RF output is not the same as effective radiated power, which also depends on antenna gain and cable losses. More power does not guarantee useful range. ITU-R Recommendation P.1546-6 models terrestrial radio propagation from 30 MHz to 4,000 MHz, reflecting how terrain, antenna height, and location affect coverage. A basement test and a rooftop test can produce very different results.

Tip 2: Check audio specifications, not just the power figure. Look for signal-to-noise ratio, total harmonic distortion, stereo separation, and frequency response. These figures help predict whether speech will sound clear or music will feel flat. ITU-R Recommendation BS.450-4 describes FM broadcast system parameters, including peak frequency deviations of 50 or 75 kHz for different systems. Match the kit’s settings to its intended system. Details matter.

Tip 3: Compare the full signal chain. A stable power supply, suitable antenna connection, and clean audio input can matter as much as the transmitter itself. Check whether the stated range assumes an unobstructed line of sight; many product estimates do. I would treat them cautiously. A small test in the actual installation space is more revealing than a headline number, though even that test may not capture every condition.

Evaluating Included Components and Compatibility

Check the parts list before comparing prices. A kit may include a circuit board but leave out the power adapter, antenna, or audio cable. That changes the real cost. Look for exact connector types and cable lengths. A photo of the package is useful, but the written list matters more.

Compatibility needs careful checking. Match the transmitter’s stated frequency range to your intended receiver, and confirm the power supply’s voltage and polarity. A mismatched adapter can damage components. Check antenna impedance and connector style, too; a plug that almost fits is still the wrong plug. If audio matters, inspect the input type and supported signal level. A phone output and a line-level mixer output may behave differently. Small details count.

Read the assembly guide before buying. Clear diagrams, labeled parts, and troubleshooting steps are signs of a more usable kit. I would also check whether solder, tools, and a suitable enclosure are included. These are easy to overlook. One minor flaw in my own buying process is that I tend to focus on the board and forget the cables. Make a simple checklist instead: power, antenna, audio, connectors, and documentation. Compare each item with your setup, not just the product photo.

Assessing Setup, Safety, and Ongoing Support

An FM radio transmitter kit should fit the space, skills, and equipment you actually have. Check whether the instructions show clear assembly steps, labeled connections, and a parts list. A small workbench, a basic soldering iron, and a steady power supply may be enough, but confirm the kit’s requirements before buying. Small details matter. If setup depends on parts or tools you cannot easily obtain, the project may stall.

Read the safety notes before connecting power. Look for guidance on voltage, heat, ventilation, and antenna placement. Use only frequencies and power levels permitted where you live, and check local requirements before transmitting. A poorly placed or incorrectly configured transmitter can interfere with nearby reception. Keep the unit dry, avoid touching exposed conductors while powered, and follow the supplied grounding instructions. It is easy to assume a low-power kit needs little care; that assumption can be wrong.

Ongoing support matters after assembly, too. Prefer kits with complete documentation, a clear troubleshooting guide, and access to replacement components or technical help. A useful guide explains what to check when there is no audio, weak reception, or unexpected heating. Support should help you diagnose the problem, not simply tell you to replace the board. Check how questions are handled and whether replies include practical details. Sometimes, the instructions still leave gaps.

Go to Top